Open Now 04:08:45 PM

Mon to Sun 24/7

5 Star Service

Locations we service

All Day Plumbing | Top 10 Best Plumbing Tips For Winter

Top 10 Best Plumbing Tips For Winter

Use these plumbing tips this winter to keep you and your family warm without running up the bills! Plumbing issues and cold weather don’t go hand in hand – a primary reason for this is that water expands when it freezes, which can be catastrophic for you if it results in a burst pipe. Therefore, it’s important to prepare for the winter season as best as you can to avoid any turbulent months or costly repair bills, and there are plenty of ways to ensure your house stays safe throughout the whole year.

All Day Plumbing | Top 10 Best Plumbing Tips For Winter

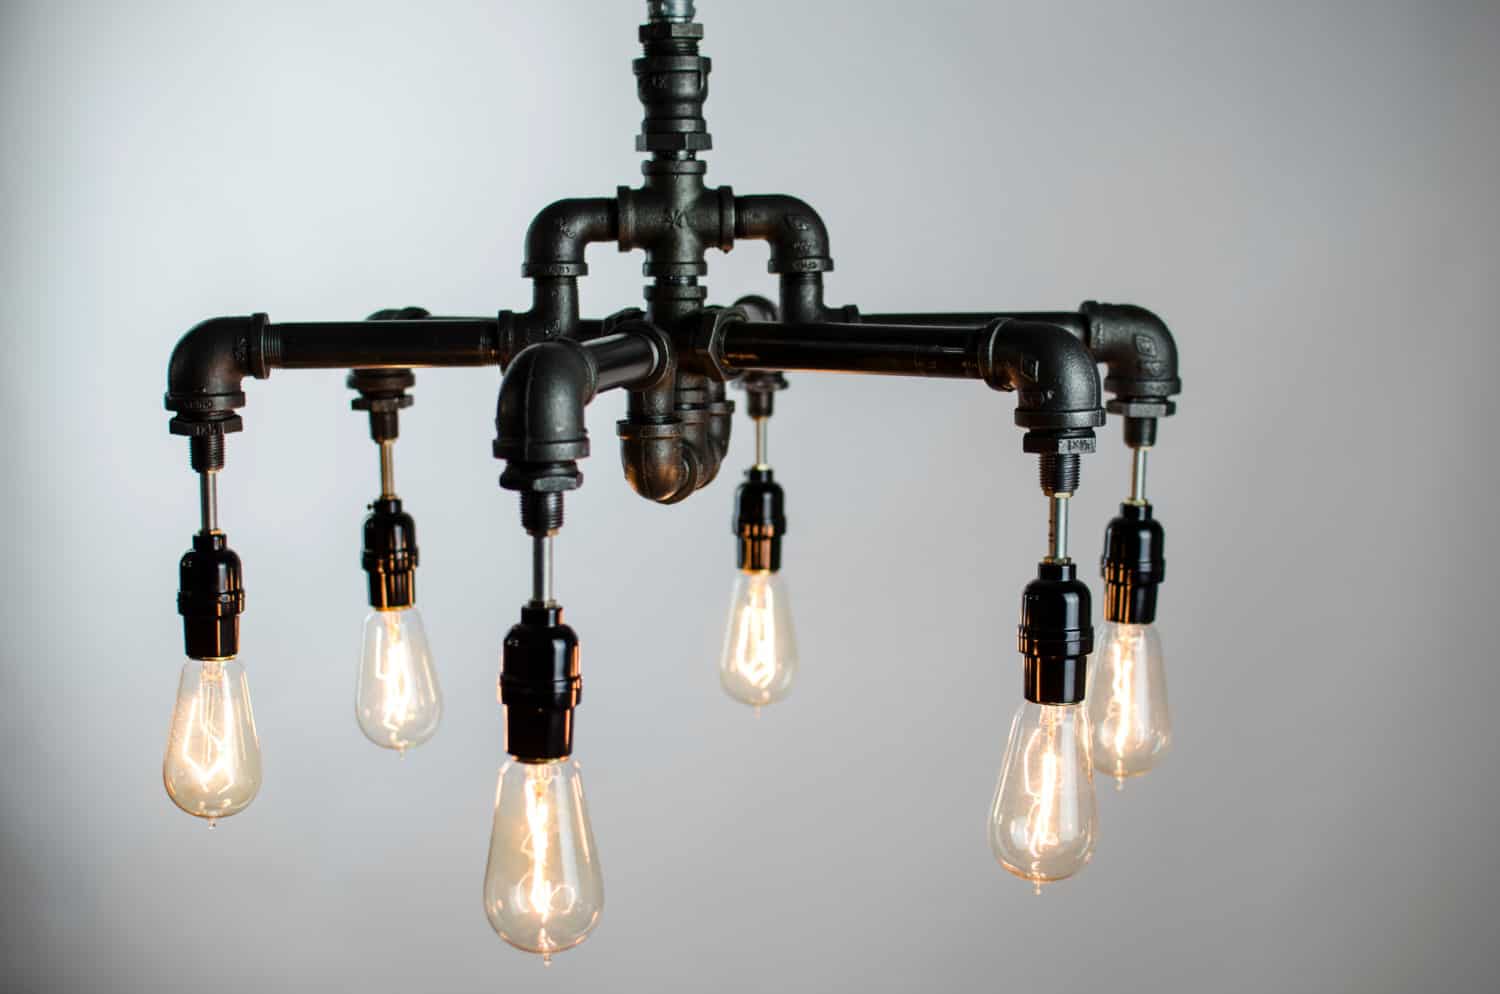
Plumbing Tip 1: Insulation, insulation, insulation

We can’t understate the importance of insulating your pipes, as this will help your plumbing keep a working temperature even in dire circumstances. Even simple foam padding is enough in this regard, and its effectiveness will only go up if you follow the next nine tips alongside it. If you already have insulation, then check it regularly – does it still neatly cover the pipes? If not, you should reseal them with duct tape as soon as possible.

Plumbing Tip 2: Install heat tracing cables

Heat tracing cables can be used to remotely heat the pipes and prevent them from freezing no matter the temperature. These cables are placed beside your plumbing, and use a built-in thermostat to detect any heat changes; they use electric heating elements to warm the pipes when it senses they are too cold.

Plumbing Tip 3: Switch off your water supply if you’re going anywhere

Unfortunately, there are many horror stories of families who go away for the winter, only to return to frozen, cracked or even burst pipes. This is obviously a major issue even at the best of times, but a good way to minimise the potential damage (outside of following the other tips on this page) is to turn off your water in preparation. That way, even if your pipe does crack, the damage will be substantially lower.

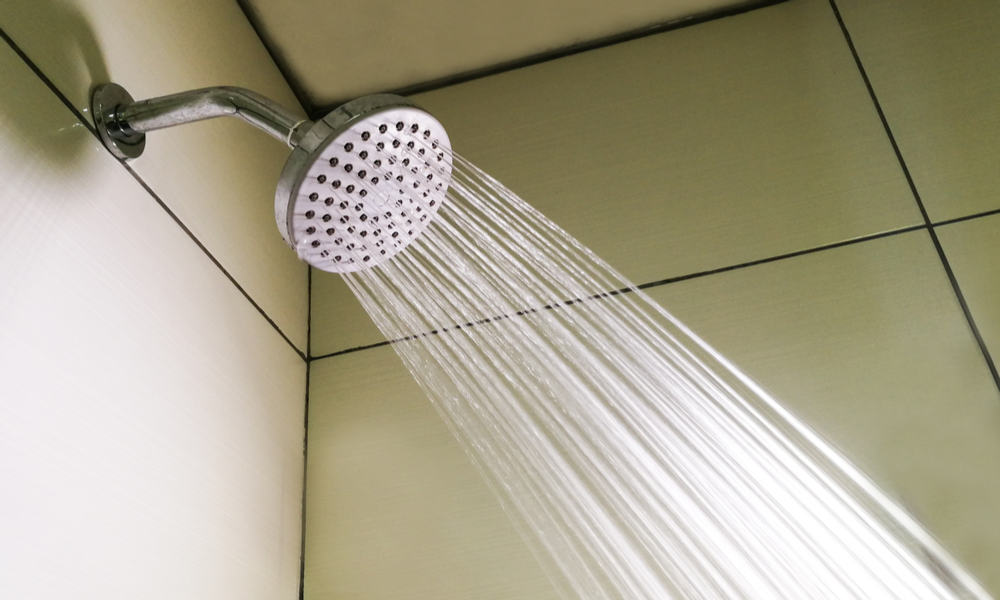
Plumbing Tip 4: Disconnect the hoses

Similar to the above, your hoses can carry a risk if they are filled with water and connected to your home’s water supply. If the water in the hose freezes, it can back up through the pipes, causing cracks and further chaos.

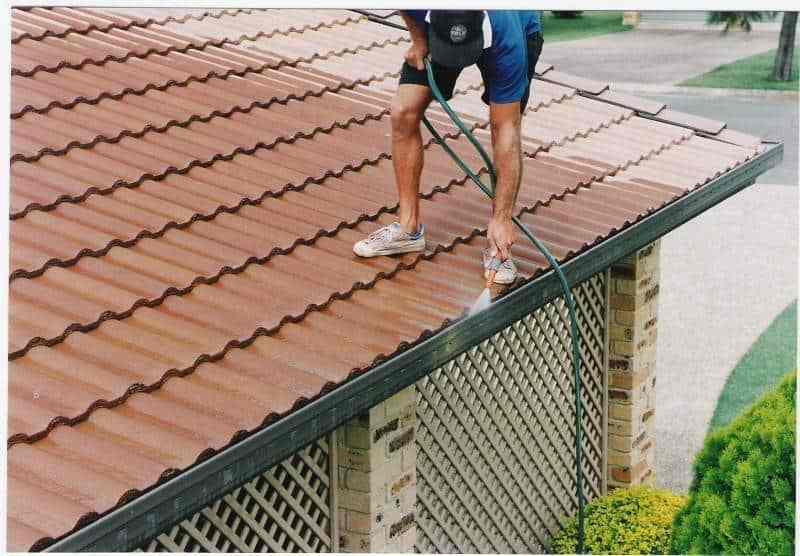
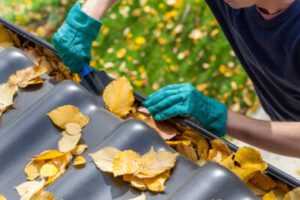
Plumbing Tip 5: Clean your gutters

If your gutters are clogged and full of leaves, debris and other riffraff, then you will need to clear it out before winter begins. This blockage can prevent water from being effectively drained by your plumbing, which could lead to anything from minor leaks to flooding.

Plumbing Tip 6: Install a Smart Thermostat

If you have a Wi-Fi-compatible smart thermostat, then this allows you to be ready for any drop in temperature, whether it is sudden or expected. Your thermostat will communicate with other systems as well as you directly so that you know when to dial up the heat. They are also highly energy-efficient, letting you save money that can be better spent on other ways to keep your plumbing winter-safe.

Plumbing Tip 7: Perform a power flush

A power flush is a method of cleaning sludge or rust deposits from your heating system; if you do your regular maintenance as recommended, power flushing is only necessary every 5-6 years. If you have not done it before, however, then it can’t hurt to get a head start. If parts of your radiator are always cold, then you might have a build-up that can be resolved by a qualified engineer.

Plumbing Tip 8: Keep an eye on the weather forecasts

This tip might feel particularly obvious, but you can never underestimate the power of the weather to sneak up on you. It’s always good to be prepared, or else you might find yourself rushing to heat, insulate, or save your pipes during an unexpected cold snap.

Plumbing Tip 9: Seal any gaps or holes that you can

A draft of cold air can enter the house in many ways, and there could be plenty of holes in your property that would allow it to do so. Use expandable foam as a sealant, and be sure to specifically target the area around the pipes – this could go a long way towards preventing a leak from forming.

Plumbing Tip 10: Contact a professional if you have a plumbing emergency

If the worst happens and a pipe bursts or your plumbing stops working in some other way, then there can only be one solution – get in touch with a seasoned plumber as soon as possible. They will be able to quickly and effectively diagnose the issue and get to work fixing it so that you can enjoy the rest of winter without significant worry.

Your pipework is more delicate than you might think; just because it has served you this far, does not mean it’s infallible, or does not require servicing. At All Day Plumbing, we understand that emergencies never happen according to a schedule – if you are in the Sydney area and need help with your plumbing throughout winter, then get in touch with us as soon as you can and book an appointment.

Top 10 plumbing mistakes made by DIYers

Calling out a plumber can be expensive, especially when it comes to repairing those little jobs like a leaking tap or a non-flushing toilet. But while it may look easy to remove a few pipes or replace a washer, doing it wrong can create more problems later on.

So, in this blog, we are going to look at the top ten plumbing mistakes DIYers make. Avoiding these common mistakes will greatly improve the reliability of your plumbing and reduce the need to call out a professional plumber if things go wrong.

1. Using drain cleaner for sink blockages

Using a drain cleaner to unblock a sink seems like the obvious choice, but doing so may cause more problems than it solves. Drain cleaner is caustic and can easily corrode metal pipes and destroy rubber gaskets if left in the system too long.

The best way to unblock a sink is to use a barbed drain cleaning tool. If this doesn’t work, remove the P-trap and flush out the blockage with water. Drain cleaner should never be used to unblock a sink.

2. Over tightening pipe fittings

When installing pipe fittings, it makes perfect sense to make sure they are nice and tight. But overtightening plastic or metal fittings can cause them to crack, which can result in leaks later on.

When installing fittings, lightly tighten them with a wrench. Don’t apply too much force and avoid cranking down on the handle. Once tight, you should still be able to remove the fitting with light pressure from a wrench.

3. Putting Teflon tape on backwards

Teflon tape, sometimes called PTFE tape, is designed to wrap around threads to prevent leaks. But many DIYers put the tape on backwards so that it unwinds when the thread is tightened.

For best results, wrap the tape three times around the thread in a clockwise direction and make sure you use the right colour tape. Use white or pink tape for water pipes and black tape for gas pipes. You should never use Teflon tape on a flare or compression fittings.

4. Not having the right spare parts

It is common for DIYers to use any spare washers and O-rings they have hanging around when they’re fixing a leaking faucet. However, not using the proper parts will result in more problems later on.

These items are cheap, so don’t risk making the problem worse by installing the wrong parts. Take a trip down to the local hardware store and buy a complete set of washers.

5. Not turning the water off

It’s a rookie mistake and you’ll only make it once, but not turning the water off before replacing a valve or washer is probably one of the most common and damaging mistakes we see.

Make sure you always turn the water off at the mains before making repairs to any pipework, even if it’s just a washer or O-ring. That will save you from flooding the room with water and causing thousands of dollars worth of damage.

6. Using too much force on jammed shut-off valves

Shutoff valves that have not been used for a long time have a habit of seizing. The temptation is to apply pressure to the knob in an attempt to force it open, but this risks breaking the knob and breaking the valve stem.

The valve is seized because the stem seal has fused to the valve stem. If you can’t move the shut-off valve by hand, use an adjustable wrench to loosen the stem nut just enough to break the seal. You should then be able to turn the knob as normal.

7. Sweating copper pipes with water in the line

Sweating refers to the process of soldering two copper pipes together. To create a tight seal, there must be no trace of water in the pipe, because water turns to steam when the blowtorch is applied and that creates tiny pinholes in the weld.

So, make sure the pipe is dry and no water can run down it before sweating. Plumbers used to use white bread to seal pipes, but these days, we prefer to use a special plug to keep the water out.

8. Not using the right tools for the job

Most DIYers attempt to make do with the tools they have at hand, however, not using the right tool for the job makes everything more difficult. A wrong sized wrench can strip a nut and removing a nipple with a pair of pliers can break the pipe.

Plumber’s tools are not expensive, and they are certainly a lot cheaper than trying to fix problems caused by using the wrong equipment, so do yourself a favour and invest in the right tools for the job.

9. Using the wrong drain fittings

Using the wrong drain fitting will not only result in some unpleasant smells, but it could also put you in breach of building regulations. So, you must know the difference between a tee, wye and long or short sweep elbow before fitting them.

Knowing which type of fitting to use is complicated by several factors, including the location of the drain and the directional flow of the water. If you are in any doubt about the correct fitting to use, get in touch with a professional plumber.

10. Installing saddle valves

Saddle valves are used when a low-pressure stream is required. They are often installed for use with appliances such as ice makers or humidifiers, but saddle valves are notorious for leaking, with the leak often going unnoticed for months.

So, it’s best to avoid using saddle valves, even if one was supplied with your appliance. Throw the saddle valve away and use a ball shut-off valve instead. If you already have saddle valves installed, it’s a good idea to replace them before they start leaking.

Conclusion

While there is nothing wrong with attempting plumbing repairs yourself, especially if it is a simple leaking tap or a blocked toilet, you need to be aware that there is a right and wrong way to do things. Doing it incorrectly will only make the problem worse.

If in doubt, don’t hesitate to call a professional plumber. The plumbers at All Day Plumbing are here to help solve your problems both large and small. So, if you need help, give us a call today on 1300 583 587 or complete the contact form here.

Plumbing tools a homeowner would use

There are plenty of plumbing tools available for household use. However, it can be difficult to know which appliances are essential and what their functions are. As professional plumbers based in Sydney, we have plenty of experience in diagnosing common household plumbing issues and how to fix them. Take a look at the list of plumbing tools that we recommend to every homeowner so that you’re well prepared when it comes to tackling small plumbing issues!

1. Plungers

Plungers are an essential tool for homeowners with blocked or clogged toilets and sinks. They work by forcing air into the toilet or sink drains which increase suction pressure. By moving the appliance up and down for 10-20 seconds, the water pressure can remove most clogs and restore casual water flow.

There are two types of plungers that you should consider for your home: a flange plunger and a common sink plunger. Otherwise known as a toilet plunger, a flange plunger differs from the standard sink style in that it features a rubber flap that fits well to a curved toilet drain. It’s imperative to have at least one plunger in your home as it can prevent common drain blockages. A flange plunger is the best all-rounder as the flap can be tucked away, which allows for it to function as a regular plunger for showers, baths, and sinks if needed. We recommend taking care of your plunger and replacing it if the wooden shaft becomes loose.

2. Sink wrenches

A sink wrench, also commonly known as a basin wrench, is often overlooked by homeowners as it only offers one primary function. However, it is a staple tool amongst professional plumbers as it performs its one job better than any substitute. Every homeowner experiences loose faucets or wants to replace existing ones every once in a while, and the sink wrench works to loosen or tighten mounting nuts that are hard to reach.

It’s a self-tightening wrench with a long T-bar handle and pivoting head, making it unique. Sink wrenches are specifically designed to make faucet replacements and removals more efficient as they are smaller than other wrenches, meaning they can reach low-profile mounting nuts and flexible supply tube nuts behind the basin. Simply attach the wrench to the nut and crank it left or right to loosen or tighten. Remember, lefty-loosey and righty-tighty!

3. Tubing cutters

Are you looking for a clean finish on your piping jobs? Then a tubing cutter is the ultimate tool for you. They are easy to use and are often less-time consuming than alternatives, such as hacksaws. Tubing cutters use a sharp wheel that, when rotated, slices through the pipe and provides top-quality cuts.

They are a must when removing and replacing damaged pipework or when cutting piping prior to installation. This means that home pipes are sealed properly and avoids the need for reparative action later. There are plenty of different tube cutters available for various materials, including copper, PEX tubing or PVC plastic. We recommend purchasing an adjustable tube cutter that can adapt to different pipe sizes, or one tailored to a specific material if your home piping is homogenous.

4. Tongue-and-groove pliers

Unlike basin wrenches, tongue-and-groove pliers are handy for multiple household jobs. For example, sump pumps and well pumps are a common feature in Australian homes, and tongue-and-groove pliers are effective in gripping the piping of these pumps for repair. Typically, a plumber will require certain information about a pump before a repair service can be dispatched. Whether it be loss of power, bad water flow, or pungent smells, these pliers will help to identify the problem and notify your plumber. They have long handles and angled jaws which provide a strong grip for almost any nuts, bolts, and irregular-shaped objects.

5. Pipe wrenches

Wrenches provide greater torque than pliers which makes them more suitable for plumbing jobs. A pipe wrench has an adjustable design which means it can grip various objects and is commonly used to secure or remove pipes. They are typically used by homeowners when dealing with strong materials, such as galvanised steel or threaded iron, on items such as pressure regulators, hydrants, and water heaters.

These plumbing tools are essential for homeowners when dealing with small household plumbing concerns. However, it is imperative that you contact a professional when it comes to larger jobs. These may include burst pipes, lower water pressure, serious backflow issues, no water, or complete appliance installations. This is because, if a fault occurs at any stage of the repair, this could cause serious damage to your water system and lead to pricier repairs and unnecessary work.

All Day Plumbing is a family-run business in Sydney that can help assist with any plumbing repair you have. Simply call us on 1300 583 587 for 24-hour and same day services.

Fabulous Plumbing Pipe Light Fixture | All Day Plumbing

Make A Fabulous Plumbing Pipe Light Fixture in 4 Easy Steps

Want to build your very own plumbing pipe light fixture? Thanks to increasing discourse around climate change and the impact we’re all having on the planet, more and more people are starting to upcycle and make their own home decor and furniture. One noticeable trend in upcycling that has been gaining more traction is the creation of homemade light fixtures using materials such as cutlery and piping.

23 Awesome Plumbing Pipe Furniture Designs

We deal with a lot of pipes at All Day Plumbing, so we wanted to share this handy guide on how to make your own fabulous plumbing pipe light fixture. This unique light fixture will add some real character to your interior decor with a nostalgic, inviting ambience.


How to make a plumbing pipe light fixture

To start with, think about where it will be located in your home. Is it going to be a centrepiece in your open kitchen or act as some sort of chandelier in your entryway? Dimensions are important to consider here, as plumbing pipe light fixtures offer unlimited versatility.


Things to consider before making your fixture

This project will require a good level of foresight so that you can effectively construct your desired light fixture. We have outlined a few considerations below:

  • Design your outline with sizes, styles and location in mind
  • Source all of your materials before getting started on construction
  • Ideally, draw out a blueprint of your design with all of the necessary components
  • Allow for alterations throughout the process
  • Make sure all of your materials and components will be safe to use as a light fixture
  • Consult an electrician for the wiring and installation stage unless you are qualified


Starting your build

A good place to start with your plumbing pipe light fixture project is to make sure you have all of the required materials. We have included a general list of things you will need, but your inventory might be different depending on the style and size you opt for. You will need:

  • A selection of pipes including connectors, elbow joints, tees, flanges and unions
  • Light bulb sockets
  • Your choice of light bulbs
  • Spray paint
  • Floor flange
  • Coupling adapters
  • Gloves

There are several brands that sell piping which is great for interior design use. These pipes tend to be pricier but may fit your aesthetic better. For a genuinely upcycled pipe light fixture, sourcing old piping is the way to go.

Once you have gathered all of your materials, you should clear a workspace that you won’t mind getting a little dirty. Give your pipes a thorough clean with soapy water to remove any debris. It’s important that the pipes are completely dry before assembling, otherwise, the pipes may not affix to one another properly.


Step one: Assemble the frame

Step one is to construct your pipe light fixture design. This step will require you to wire-as-you-go, working from the outside frames and moving inward until you have a collection of wires coming out of the floor flange.


Step two: Affix the coupling adapters

Once you have assembled the frame of your light fixture, you will need to affix the coupling adapters to the section where the light bulbs will sit.


Step three: Get painting!

With the frame assembled, you can get to painting your fixture in whatever spray paint you like. You can use other paint mediums, although spray paint offers an even, polished look. Remember your gloves, as this part can get quite messy!


Step four: Mount the fixture

After letting your paint dry, you will need to mount the pipe lighting fixture to your ceiling. Do this using the floor flange. For added aesthetics, you can use a wooden or metallic plaque to create a base for your fixture.

This project does require some wiring, so it’s recommended that you seek a professional electrician to help with this stage. The risk of electrocution is high if you don’t know what you are doing with exposed wiring.


Enjoy your fantastic plumbing pipe light fixture!

This is a relatively easy project, but the finished fixture is a fantastic addition to any home. With a versatile design that can be tailored to meet any style or shape you need as well as an inspired aesthetic, it’s no wonder that plumbing pipe light fixtures are growing in popularity.

If you’re considering taking on this project yourself, be mindful that the wiring should be completed by a professional electrician. If you would like assistance with your installation and you are based in Sydney, please contact us at All Day Plumbing. We would be more than happy to help you complete your stylish new plumbing pipe light installation.

How to build plumbing pipe shelves

In recent years, piping structures have made quite a name for themselves in the world of interior design and are now being used in all kinds of settings.

Not only does it look great, but pipe shelving can be an incredibly sturdy solution for holding all your possessions. Perfect for use in kitchens, cupboards, living spaces and as a bookcase, you can put old piping to good use with this DIY guide to building plumbing pipe shelves.

Design and size

Before getting stuck into the manual work, you need to decide on the kind of design you want for your plumbing pipe shelves. How do you want the shelves to look? Where do you want them to go? Ensuring you take the right measurements of the space you are putting your piping shelves in is crucial.

You might want to draw out a plan of your designated space including all the measurements and how your shelves are going to fit into it. Doing a drawing before you buy any materials is especially important so you know how much piping and shelf material you will need.

The shopping list

After your planning is done, it’s time to get the supplies! This will include the piping itself and the wooden shelves that you will use with the pipe structure. You don’t have to use wooden shelves, but in this instance, that’s what we’re using.

A basic list of supplies for building plumbing pipe shelves:

  • – A drill with a 1 1/2″ spade bit
  • – A table saw
  • – Screws
  • – Painter’s tape
  • – Minwax wood finish
  • – A rag for applying stain
  • – 1/2″ diameter black iron pipes

For one shelf (which can be used as a template to upsize accordingly)

  • Pine board, 2″ x 12″ x 6′, cut to fit the space
  • 4 x 3/4″ black flanges
  • 2 x 3/4″ black elbows
  • 4 x 3/4″ 6″ black nipples
  • Pipe clamps – x2 per board

Where can I buy piping for shelves from?

Local supply stores will sell a variety of plumbing piping that you will be able to use for your shelves. You should find the relevant fittings here, too. You can also look online for piping, elbows, tees, flanges and screws for your project.

Building your plumbing pipe shelves

Each person’s design will differ, so it’s okay to alter this guide to fit your space and ideas. The above supplies are for one wall supported shelf, but if you wanted a column of wall shelves stacked on top of each other, you can multiply the amounts to suit your requirements.

Step 1

Cut your shelf/shelving to the right size using a table saw. Sand and finish the wood once you are completely sure it’s the right size. You can use grit sandpaper and acrylic or danish oil to do this.

Step 2

Using your 1 1/2″ spade bit, drill two holes into either side of the wooden board. This is where the iron piping will go through, so make sure the holes are big enough for this and that they’re drilled in an appropriate place. Ideally towards the front of the board, as the back will be supported by the flanges.

Step 3

Stain your wood shelves. This is where you will put your own touch on your shelves to make them a colour that suits your decor. You may want a darker stain for a contemporary rustic look or go for a white colour to brighten up your home.

Step 4

Now you can start assembling your plumbing pipe shelving. Most standard piping structures will have a long pipe, a second shorter pipe, a tee and an elbow. The shorter pipe will attach to the flange off the wall and the longer pipe will sit vertically to hold the shelf up.

Step 5

Screw the flanges to the wall. Ensure you have a measuring tape or a spirit level that will enable you to check everything is in line. You may want to use a pencil to mark the alignment. Just make sure you are accurate as you don’t want wonky shelves!

Step 6

Attach your pipe structure to the flanges on the wall. Make sure they are attached firmly and will be able to bear weight.

Step 7

Use your pipe hangers to attach the pine board to the iron piping securely.

Simple shelves to transform your space

These easy-to-build shelves are great because you can customise them to reflect the style you want. They are minimalistic and are sturdy enough to hold heavy items such as books, televisions and kitchenware. When building plumbing pipe shelves, make sure you have at least one other person with you for extra support with some of the fiddly bits!

Bleach vs. vinegar: what kills mould?

Mould is often considered one of the worst problems a homeowner can encounter. Sydney, in particular, is known for having a humid climate and has a bad reputation when it comes to bathroom mould.

From hospital grade bleach to organic essential oils, everyone has their own solution to removing mould in the bathroom or other areas of your home. However, not all cleaning products are safe or effective when it comes to killing mould and preventing regrowth. So, what is mould and what’s the best way to remove it?


What is mould?


Mould is a naturally occurring fungus similar to yeast or mushrooms. It plays an important part in the greater ecosystem by helping to break down organic matter.


Most of the time, mould spores exist freely in the air and rarely cause problems. However, damp areas that are poorly ventilated, such as a bathroom, are the ideal environment for spores to take hold and flourish.


Health risks


Most people will not experience side effects of mould in the home, and the first thing many homeowners are aware of is visible mould growth. However, mould can cause adverse health reactions and any mould problems must be addressed immediately.

The New South Wales Government states that most reactions to mould exposure can be treated by a GP.

Signs of mould growth

Visible mould is often one of the last signs your home has developed a problem. Often, leaks or other water damage including condensation buildup are not only a sign that repair is needed, but that mould may be taking hold in your bathroom. Other signs to be aware of include:

  • Smell – A damp, decaying or musty smell in a room that has been thoroughly cleaned may suggest leaking water under the floors or behind walls.
  • Damaged walls and ceiling – Peeling paint, sagging ceilings or cracked plaster suggest water buildup and damage. Likewise, a floor that sags or tiles that are lifting can point to mould presence beneath the surface.
  • Slimy surfaces – Before mould becomes visible, the early growth may leave a slimy feel or muddy appearance on tiles and paintwork.

Does bleach kill mould?

For hard bathroom surfaces, bleach is suitable for mould removal.

Sodium hypochlorite, the main ingredient in household bleach, will kill mould. However, bleach does not soak into porous surfaces, and cannot reach the lower membrane (similar to a root system) of the mould to prevent regrowth.

This means that bleach is only suitable to remove surface mould on nonporous surfaces, such as sealed tiles and ceramics (bathtubs and toilets), stainless steel, and glass.

It is recommended that you spray diluted bleach onto mouldy areas and leave it to soak for 5 minutes before scrubbing it lightly with a nylon brush or pot scrubber. A light spray of diluted bleach solution weekly on hard surfaces can help prevent mould growth.

Does vinegar kill bathroom mould?

Vinegar is an effective cleaning product for removing bathroom mould. It can penetrate porous surfaces including wood, plaster and grout to kill mould and prevent regrowth. Vinegar is also suitable for use on hard surfaces and is favoured as a more natural and safer solution for cleaning many areas in the home, including bathrooms.

Vinegar should be diluted with 1 part vinegar to 4 parts water, sprayed on surfaces and left to soak for up to 30 minutes before lightly rubbing it to remove it. A mild dishwashing liquid may also be used to remove stains. Vinegar is also safe to use on clothing, bedding and towels.

Cleaning your bathroom safely

Whenever you’re cleaning with bleach or vinegar, you must follow the manufacturer’s instructions closely and use protective equipment, including gloves.

Always work in a well-ventilated area, and never use bleach and vinegar at the same time. The chemical reaction can result in chlorine gas being released, which can lead to serious health risks when inhaled.

Spot test an inconspicuous place before cleaning to ensure that you will not damage the surface. This is particularly important when using bleach, or if you are planning to use an abrasive scrubber on painted surfaces.

Preventing mould

Mould forms in places that remain damp and have poor ventilation. Improving the air circulation and sunlight available in your home will help reduce the likelihood of mould starting to grow. You can also reduce humidity by ensuring exhaust fans are used and avoiding using clothes horses to dry items indoors. It’s also worth considering investing in indoor plants or a dehumidifier to improve air quality and reduce moisture.

However, if a leaking tap or pipes, worn caulking, blocked drains or damaged guttering is the cause of water damage in your home, ultimately, it will require a professional inspection and repair.

All Day Plumbing is here for you, whether you need to repair a leaking tap or complete a full bathroom renovation. We offer 24-hour emergency plumbing services and have an on-time promise.

If you have any questions or would like to know more about preventing and removing mould in your home, please contact us on 1300 583 587.

5 tips to help you avoid major plumbing repairs

Taking care of your plumbing can help you keep on top of any smaller issues before they develop into major plumbing repairs. You don’t need to be an expert to ensure your plumbing is well maintained – all it takes is some basic precautionary measures and you can avoid hefty repair bills down the line.

One of the most common issues related to plumbing stems from poorly maintained or amateur repair work on pipes and systems. It really pays to bring in an expert if you have noticed a problem with your pipes. To help you diagnose any issues, we’ve compiled 5 tips to help you avoid major plumbing repairs.

Tip 1 – Understand your property’s plumbing

Get to grips with your plumbing system and try to figure out where things like the main shutoff valve and main pipes are located. This can help you address any leaks as well as provide you with a way to turn off the water should any big problems, like flooding, arise. This is a stop-gap tip as if you do find a problem, your best bet is to always contact a professional plumber.

Tip 2 – Don’t empty things down the drain

Most homeowners don’t have a garbage compactor for their sinks, meaning that if foreign objects such as leftover food end up down the sink, that is where they stay. This can cause a range of issues including bug infestations, bad smells and blocked pipes.

Unfortunately, many people seem to use sinks and toilets as a way to discard unwanted food scraps, wet wipes and much more. This is a very common cause of plumbing problems that can be entirely avoided if you treat your sink and plumbing properly. Do not discard improper items down the drain or toilet and you will dramatically increase the health of your plumbing.

Tip 3 – Do not overtighten pipes

If you have decided to get your hands dirty and attempt a simple DIY repair on your plumbing, do not fall at the final hurdle and over tighten your pipes. Doing so will leave you in a troubling situation as your pipes might crack, leak and leave you worse off than before.

It’s in your best interests to tighten your pipes, but leave a little bit of wiggle room so the connection is sealed but not overly tightened. That way, less pressure is exerted on the nut and thread of the pipe.

Tip 4 – Avoid pouring chemicals directly into your plumbing system

If you have ever used a chemical product to de-clog a drain, you might have read on the label that the chemicals are designed for bathroom or kitchen plumbing. This is because the chemicals are formulated to tackle specific blockages.

Chemical cleaners are good for softer blockages, but when it comes to hardened items and major blockages, a chemical unblocker will be of no use. What’s worse, using these chemicals can weaken your plumbing system and degrade the material of your pipes. Wherever possible, avoid chemical solutions directly entering your plumbing system.

Tip 5 – Don’t fix plumbing problems if you’re unsure what’s causing them

Even the smallest leak in your pipes can stem from an incredibly complex plumbing problem that would be beyond your level of expertise to repair. If you attempt a repair without sufficient knowledge of the problem, then you are setting yourself up for failure. Without a keen sense of what is causing a leak, you could just end up making things worse.

Bringing in a professional plumber when things are beyond your pay grade is a smart decision. They will have all of the knowledge, tools and responsibility to address your plumbing problem. That means if something does go wrong, you are not solely responsible for the situation. More often than not, though, a professional plumber will be able to inspect, identify and resolve any issues with your plumbing.

It is also a good idea to use the same plumber wherever possible, as they will have a good understanding of your plumbing system and will know what to expect if they get called out again.

You should also save their number so you can contact them when you’re facing another emergency plumbing issue. Save yourself the hassle and call them instead of doing a DIY job and making the problem worse than it is.

Bonus tip – stick with a trusted plumbing business

Although some minor DIY work on your plumbing is perfectly reasonable – provided you know what you are doing – it really benefits you to have a reputable plumber on hand. Our team at All Day Plumbing is here to help, so call us today if you would like to arrange an appointment.

4 Ways to Fix a Leaking Shower Head | All Day Plumbing

4 Ways to Fix a Leaking Shower Head

Is the sound of your leaky shower head keeping you up at night?

When the entire house is silent, all you can hear is that unmistakable sound of water dripping onto the bathroom tile. Not only that, but the leaking shower head is also the reason for your water bill being so high.

But what if you don’t want to replace your entire shower head? Thankfully, you don’t need to do a complete bathroom renovation to fix it. Depending on what the problem is, you might even be able to fix it yourself.

If you want to sleep peacefully and save money on your water bills, try these tricks to fix a leaking shower head.

Why is Your Shower Head Leaking?

Depending on when your shower head begins leaking can help you narrow down what the problem might be. For example, if it continually drips once the shower is turned off, then the issue could be larger than the head itself.

If your shower leaks immediately once it’s off but eventually stops, then it’s usually a problem related specifically to the head. In these instances, you should be able to fix it yourself. However, it’s worth discussing with a plumber as they are the experts when it comes to diagnosing issues with leaks and finding the best long-term solutions for you.

How to Fix a Leaking Shower Head

There could be several reasons why your shower is leaking. But these are the four most common causes and the solutions to stop water from getting wasted.

  1. Clean out the Shower Head

You should always start by trying to clean out the shower head first. It’s the least invasive and doesn’t require you to take a single tool out of your toolbox. 

Simply unscrew the shower head and remove the face plate. Get a bowl of white vinegar, then submerge the faceplate and shower head into it. Leave it for eight hours so that it can dissolve any build up in the holes of the shower head.

Remove it and rinse thoroughly so that any remaining obstacles are cleared out. Wipe down with a cloth and use a toothpick if you notice anything stuck inside the holes. Reattach and test to see if the leak has stopped.

  1. Replace the Washer

An old washer is often the culprit of any leak inside a house. On a shower head, it is often referred to as the O ring. It’s located in the shower head and also in the taps.

To replace the washer, you’ll want to turn off the water supply first. Remove the shower head and look for a nut. Unscrew it by hand and then replace the washer beneath it. Make sure that it’s exactly the same size otherwise it won’t fix anything.

Reattach the shower head, turn on the water supply, and see if the leak has stopped. If it hasn’t, then you might need to replace the washers on the taps. Turn off the water supply again. Unscrew the fixtures and then the bolt attaching them. Replace the washer and reassemble the parts. Turn the water supply back on and cross your fingers that the leak has stopped.

  1. Change the Cartridge Valve

It’s not uncommon for cartridge valves to become damaged over time. Even though they’ll either be gold or silver in colour, they still have a lifespan and need replacing. 

You’ll need to turn off the water supply first before attempting to remove the cartridge valve. Take off the tap head next and then detach the handle underneath it.

If you see a nut, then you should be able to remove it with some pliers. If you don’t see one, then you’re best to call a plumber as it will require some specialised tools to replace the cartridge valve.

Change out the cartridge valve with an identical model. Reassemble the tap and turn the water supply back on. Now you can test the shower for any leaks. 

  1. Replace the Shower Head

If all else fails, then you’re best to stop wasting your time searching for a problem and replacing your shower head. The problem might be some tiny little part within it that it’s either impossible to fix or replace.

There are several options to choose from when it comes to replacing a shower head. However, you’ll need to ensure that it connects seamlessly to your existing plumbing set up. If you want to look at changing your shower head, then speak to a plumber first to get a full understanding of your options. 

Call in the Professionals to Fix a Leaking Shower Head

A leaking shower head is not only an annoying problem, it’s also an expensive one. Every drip that comes from it is another addition to your water bill. If left unattended, it can also lead to potentially more significant plumbing problems.
Any time you have a leak in your house, you should contact All Day Plumbing. We’re available 24/7 and are experts when it comes to diagnosing why you have a leak as well as how you should fix it. Book an appointment today if you want to stop any leaks and start saving on your water bills.

5 Benefits of Regular Gutter Cleaning | All Day Plumbing

5 Benefits of Regular Gutter Cleaning

5 Benefits of Regular Gutter Cleaning

How many times have you looked at your gutters and told yourself that you should clean them one day?

If it’s been a while, then there’s probably an assortment of leaves and debris cluttered in there. All of these objects stop your gutters from doing what it does best, and that’s stopping water from overflowing into the house as well as making sure it doesn’t cause any damage to your home.

So what’s it going to take to get you on a ladder and clean out the gutters? Here are some reasons why you should set aside some time, put on some gloves, and get rid of all that dirt and debris.

  1. Cleaning Gutters Helps Prevent Water Damage

The reason why most people clean the gutters is to prevent their homes from suffering from water damage. It goes beyond your paint peeling or water bubbles forming in your walls. If you don’t clean your gutters, then it can have impacts on the structural integrity of the house. This includes the walls, ceilings, and even the floors. 

Cleaning out the gutters is a lot cheaper compared to spending thousands of dollars to ensure that your place is structurally sound. If you let the damage continue to erode your house, then it can have impacts on the value of your home if you ever decide to sell it.

  1. It Gets Rid of Pests

Gutters full of leaves, sticks, and debris can end up looking like an animal’s nest. This is exactly what they end up becoming as birds, rats, possums, and other pests decide to move in and call your gutters home.

In extreme cases, the combination of substances in your gutters can cause plants to grow. Trees and flowers will start blooming as well as mushrooms and other types of shrubbery. It might seem like you have a rooftop garden. However, your gutters aren’t designed to support this type of weight and will begin to break down due to the contents living in them.

  1. Clearing Gutters Protects Your Garden

Not many people know that blocked gutters can damage your precious landscaping. The water that eventually flows out of them can end up causing soil erosion and impact the plants you have growing in your yard.

When your gutters are working as normal, they are able to steer water away from the gardens. If you want to recycle water coming from inside the house, you can organise the pipes to get relined, so they provide your plants with the nutrients they require to stay alive.

  1. Cleaning Can Stop Your Roof Leaking

If your gutters can’t get rid of the water from your roof, then it will eventually start leaking throughout your house. The water will begin decaying the ceiling and have impacts on the materials beneath the roof.

You’ll notice something is wrong immediately when you start stepping in puddles around the house. At this point, it might be too late, and you’ll need to not only clear the gutters but also organise some repairs for the rest of the home.

  1. It Increases the Lifespan of the Gutter and Your Roof

Any plumbing professional will tell you that if you regularly clean your gutters, the longer their lifespan will be. They’re only designed to help water make its way down a drain. The weight from dirt, debris, leaves, and tree seedlings is too much for gutters to handle, and they’ll quickly begin to degrade to the point that they’ll need to get replaced.

The same can be said for your roof. As clogged gutters will not drain water, it will start impacting the shingles and begin pooling around the roof. This can end up being a major expense, especially if it causes the roof to collapse on itself. These types of costs are something that can easily be avoided if you clean your gutter on a regular basis.


5 Benefits of Regular Gutter Cleaning | All Day Plumbing

How Do You Clean Your Gutters?

While it’s a dirty job, if you clean your gutters on a regular basis, it doesn’t have to be a very time consuming one. You can have them cleared in these four easy steps.

  • Before you climb the ladder, make sure that you have all your items on your person in an easily accessible way.
  • Use a garden spade to remove the debris from the gutters. Use your hands for anything the tool can’t get rid of.
  • Flush the gutters with water to clear any remaining dirt and to also ensure it’s working as intended.
  • Finally, check the downpipes by spraying some water into it and making sure that everything is functioning appropriately.

Have You Left It Too Late?

If you’re already starting to see leaks within your house or your gutters are beginning to fail at doing their job, then it’s possible that you’ve not cleaned the gutters in time. In these instances, you’re best to organise some repairs immediately so that the water damage does not cause any structural damage. You should also start booking your gutters for an annual inspection to ensure they’re always up to the task, rain, hail, or shine.

Instead of climbing the ladder yourself, get in touch with All Day Plumbing to inspect your gutters. We can spot any corrosion issues and let you know if any repairs are needed before it’s too late. Schedule your annual maintenance now by booking an appointment with All Day Plumbing to make sure that your gutters aren’t going to let you or your house down.